…somewhere between the stitches…

knit.crochet.sew.craft.cook.


1 Comment

16 Yarnspirations for the Creative Knitter/Crocheter

Need a bit of yarny-inspiration? Here are some projects that I’ve hand selected just for you! Maybe they’ll inspire you. But probably not. Mostly, they’ll just make you laugh. Or burn your eyes. 😉

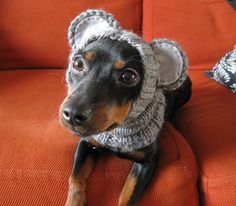
1. To Humiliate The Dog – Because what tiny dog with an inferiority complex doesn’t want to be dressed up like a mouse? You can find the free pattern for this ADORABLE dog hat/snood/ridiculousness here.

37a92b359987bddf48edde5414675bd1

2. If you’re an overachieving dog-lover with a penchant for embarrassing your canine BFF, then this should definitely be your next project. Unfortunately, the crochet pattern for this particular tool of humiliation is not available yet although Ravelry-users can check on the creative dog-mommy who created this masterpiece here to see when the pattern becomes available.
pavsheep

3. Wondering what you could make with granny squares besides an afghan? Why, a sweater and matching pants, of course! Your husband can thank me later.

0ece0ea83130dbb9045f12300b14a3ef

4. A Ravelry search for the work “toilet” results in 150+ toilet roll and toilet seat covers and even a handful of knit/crochet toilets. But there can only be one Commode-O-Dragon.
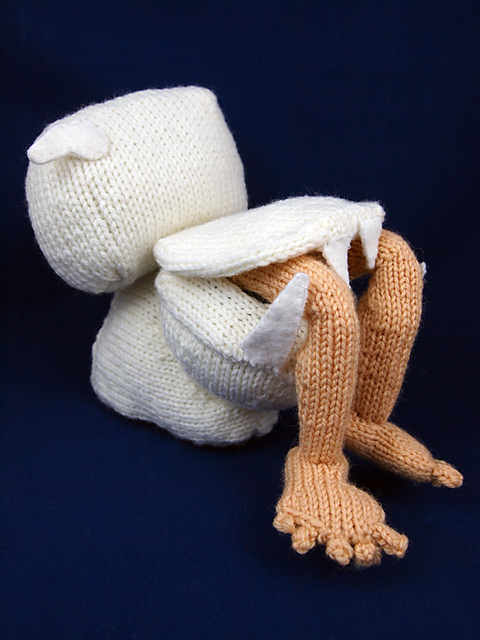
Commode-o-Dragon_web_medium25. I love seeing hand-knits on the runway. Makes me feel like my yarny-pursuits are creative and high-fashion! But apparently, I missed the memo because this is knit haute couture. 
sandra_backlund_1 99ae4ccd274ee425314e6167a3af8b98

7832b221c12e2e1ffb088145615a223a

6. I have no words.

54217e9a9ae02022e1374cf821972d1e 7. I wonder how long it took the person who knit this to get the cables just right in the crotchal region… oKKOJ

8. If the hooded cabled onesie isn’t quite enough for your manly man, then surely, this will be adequate. crazy_knit_01

10. I can’t decide if this is genius or really, really weird. 
blogging-blinders

11. This is what happens when you cross a luchador with a clown and a Cabbage Patch Kid. 1424927370235-knittedskimask 12. I don’t know about you, but this guy is seriously rocking the look. His sweater vest is the perfect match for those granny glasses. dsc01950 13. I don’t get it. crazy-knitting 14. I want to know the secret to getting the yarn to stick straight up on the mohawk! And I kind of love the pants. badass-knitting_yellowtrace_04 15. Knit pasties. ‘Nuff said. cc5fba64ee10c03884b8acbd4baf5905 16. Who needs knit penis cozies when you can knit a dress covered in them??? 2decbcef27aee9fcfeb136ebbb44b80d

Happy Wednesday! 😉


2 Comments

For the Love of Crafting

It no secret that I love to craft. From knitting and crocheting to sewing and kid’s crafts, I enjoy everything about it: scouring Pinterest for ideas, shopping for materials, thinking of ways to make things with upcycled materials, designing and making something pretty and useful out of scraps… But most of all, I enjoy making things for other people. So several years ago, when friends asked me to make things for their kids or for other friends’ babies, the business side of jkwdesigns began. And it’s been lots of fun! I love that my clients love the things I make enough to refer me to their friends and trust my skills enough to request something vague and let me run with it.

When it comes to crafting, my favorite part–hands down–is the design process, so figuring out how to turn something like a cartoon character into a hat is what I love the most. From My Little Pony’s Princess Celestia to Optimus Prime and Bumblebee and of course, this season’s favorite Queen Elsa and Princess Anna…

IMG_9571 IMG_9612 IMG_5870

Over the past couple years, I have truly been blessed with more business than I can handle. Usually, during the winter months, I am completely buried under piles of yarn, and my hands can’t knit and crochet fast enough to meet demand. And, sadly, I have come to a point where I feel a bit overwhelmed with my never-ending To-Do list, and although I still love to make things for people, as I forced myself to pick up the crochet hook after getting my kids settled into bed, I realized recently that something HUGE was missing in my crafting life. I no longer have time to just make things and give gifts to loved ones–which, for me, is the most rewarding part of crafting.

I craft for the love of the craft, but I also do it because I love to give gifts. Earlier this year, I started a Craft It Forward challenge to spread handmade love. And it’s the end of November. I’ve only managed to send out one gift. That’s not enough handmade love from me! I’ve also not had time to write and post the tutorials for the Transformers hats–I know MANY people are waiting for it! There are countless other patterns that I want to write–both for this blog and for my Etsy shop. I’ve been wanting to work on some new Star Wars themed decor for my boys’ bedroom. And now that my boys are in school, there are so many things I would like to do for their class and for their school. There simply aren’t enough hours in the day for everything. So it’s time for me to make a change.

For the love of the craft, I have decided to stop making handmade items for purchase. I want to focus my work on design and pattern writing. I want to make gifts for friends and family. I want to dedicate some more time in the kitchen working on healthy and delicious meals for my family (we were doing so well during the first half the year, but with the boys starting school and hat orders coming in, it’s been a real challenge lately!). I want to sew some curtains for my daughter’s room. I also want to continue loving the craft and not feel overwhelmed by the list of items I have to finish for paying clients. I plan to complete the orders that I’ve already taken, then spend time making gifts for some very special people in my family’s lives and focus my time and energy on the craft and not the business. When it comes to the business side, my graphic design and event planning work with delightful. has been flourishing, and unlike knitting and crocheting, it doesn’t take hours and hours of work to produce a single item. Also, because my delightful. work is ALL about the design process, it’s been much more creatively fulfilling for me.

So, readers, stay tuned! New patterns and printables (both free and for purchase), lots of giveaways, recipes and more are on their way! 🙂


1 Comment

Pattern: Little Turtle Lens Buddy

little turtle lens buddy

While I was experimenting with designs for the Little Sea Turtle Lens Buddy, I wrote a pattern for one of the prototypes–a cute little turtle lens buddy made in the round. The arms, legs and head are all one piece, so there’s no need to sew all the individual pieces together. And it’s free! Enjoy!

Materials:

Small amounts of worsted weight yarn (two colors)
5.0mm crochet hook (size H)
Elastic hair tie
Tapestry needle (optional, for weaving in ends)
Safety eyes (optional)

Pattern:

Round 1: With Color A, 36 sc around the elastic hair tie. Sl st to join with first sc. [36 sc]
Crochet elastic hair tieRound 2: Ch 1. 2 hdc in 1st st. Hdc in next 3 sts. *2 hdc in next st. Hdc in next 3 sts. Repeat from * around. Sl st to join with first hdc in round. [45 hdc]
Round 3: Ch 1. 2 hdc in 1st st. Hdc in next 4 sts. *2 hdc in next st. Hdc in next 4 sts. Repeat from * around. Sl st to join with first hdc in round. [54 hdc]
Round 4: Ch 1. 2 hdc in 1st st. Hdc in next 5 sts. *2 hdc in next st. Hdc in next 5 sts. Repeat from * around. Sl st to join with first hdc in round. [63 hdc] Finish off.

Round 5: Attach Color B. Ch 1. 2 sc in 1st st. Sc in next 4 sts. Sl st in next st. Ch 2. Dc in same st. Dc in next 2 sts. Ch 2 and sl st in same st as last dc. (Bottom right leg made)
Sc in next 6 sts. 2 sc in next st. Sc in next 3 sts. Sl st in next st. Ch 2 and dc in in same st. Sc in next 2 sts. Ch 2 and sl st in same st as last dc. (Top right leg made)
2 sc in next st. Sc in next 4 sts. Sl st in next st. Ch 2 and dc in same st. Trc in next 2 sts. 2 dtr in next st. Trc in next 2 sts. Dc in next st. Ch 2 and sl st in same st as last dc. (Head made)
Sc in next 2 sts. 2 sc in next st. Sc in next 2 sts. Sl st in next st. Ch 2 and dc in same st. Dc in next 2 sts. Ch 2 and sl st in same st. (Top left leg made)
Sc in next st. 2 sc in next st. Sc in next 6 std. 2 sc in next st. Sc in next st. Sl st in next st. Ch 2 and dc in same st. Dc in next 2 sts. Ch 2 and sl st in same st as last dc. (Bottom left leg made)
Sc in next 2 std. 2 sc in next st. Sc in next 2 sts. Sl st in next. Ch 3 and trc4tog. Ch 3 and sl st in bk of 1st ch of 3 ch. Ch 3 and sl st in same st. Ch 1 and sl st to first st in round. (Tail made)

Finish off and weave in ends.

Optional: Add safety eyes to turtle’s head.


9 Comments

Pattern: Crochet Dragonfly Applique

A very talented artist and photographer friend of mine requested a flower lens buddy with a dragonfly on it. You can see her work on her blog The Dragonfly Whispers My Name, and I highly recommend her if you live in Seoul and are searching for a family photographer! Here’s a photo she recently took of my family:

Marisa Johnson Photography


So for someone so creative and talented, I really couldn’t just make her any ‘ole dragonfly. I used the Flower Lens Buddy pattern and started experimenting with dragonflies!

flower and dragonfly lens buddy

The first one I made (on the white flower w/ pink center) looked a bit too much like a butterfly, so I elongated both the body and the wings. There was quite a bit of crocheting and frogging going on… But the result is a dainty little dragonfly appliqué pattern for your crocheting pleasure!

crochet dragonfly applique

Materials:

Worsted weight yarn
4.5mm (size G) crochet hook
Tapestry needle (for sewing pieces together and weaving in ends)

**You may use other weights of yarn an appropriately sized hooks**

Finished Dimensions:

With worsted weight yarn and 4.5mm crochet hook: 5.5 inch wingspan x 3 inches tall
With DK weight yarn and 4.0mm crochet hook: 4.5 inch wingspan x 2.5 inches tall

Pattern:

Body: Ch 16. Work all the stitches in the back bar only. Dc in 3rd ch from hook. Dc in next ch. Hdc in next 5 ch. Sc in next 4 ch. Sl st in next 3 ch. Finish off.

dragonfly tutorial

dragonfly tutorial 2

Top Wings (make 2): Ch 10. Work the following stitches in the back loops only of the foundation chain. Sl st in 2nd ch from hook. Sl st in next ch. Sc in next 2 ch. Hdc in next 2 ch. Dc in next 2 ch. 6 dc in last ch. As you work the 6 dc in the last ch, the back loop of the last ch will open/loosen up. Simply pull the tail from the beginning of the foundation chain to close the hole. Then turn the piece 180 degrees and work the following stitches in the front loops only of the foundation chain. Dc in next 2 ch. Hdc in next 2 ch. Sc in next 2 ch. Sl st in last 2 ch. Finish off, leaving a long tail to sew the wings onto the body.

dragonfly tutorial 3

Bottom Wings (make 2): Ch 7. Work the following stitches in the back loops only of the foundation chain. Sl st in 2nd ch from hook. Sc in next 2 ch. Hdc in next 2 ch. 6 hdc in last ch. Then, turn the piece 180 degrees and work the following stitches in the front loops only of the foundation chain. Hdc in next 2 ch. Sc in next 2 ch. Sl st in last ch. Finish off, leaving a long tail to sew the wings onto the body.

Construction Notes: Sew the top wings onto the body, being careful to sew onto the yarn on the back of the body so that the yarn from the wings does not show through on the front of the body piece. As you sew the bottom wings onto the body, also sew the top edge of the bottom wings to the bottom edge of the top wings for stability.

Weave in all your ends and you’re done!


10 Comments

New Camera/Lens Buddy Patterns!

UPDATE: Giveaway has now ended!

I’m very excited to be adding some new patterns for purchase!

little hippo lens buddy little kitty lens buddy sea turtle lens buddy

They will be added to my pattern shops soon (Craftsy, Etsy and Ravelry), and for a limited time, they’re available to my loyal readers for free! All you have to do is follow my blog (either via WordPress, email, or Bloglovin’) AND one of the following:

twitter tumblr instagram facebook bloglovin


Just let me know which pattern you’d like and I’ll email it to you!

*OFFER IS ONLY GOOD FOR THE FIRST 10 PEOPLE!*


9 Comments

Crochet Lens Buddy Pattern Giveaway! {limited offer}

UPDATE: The giveaway is now closed! Thanks to everyone for your interest in my patterns! I’m working on some new patterns and will have a limited free offer for those soon so stay tuned! 

I’ve been busy this past week finalizing a few patterns for sale, and they’re finally up and available (on Etsy, Craftsy and Ravelry). However, for 10 lucky readers, I’m offering all five of the lens buddy patterns for free! All you have to do is follow this blog (either via email, WordPress, or Bloglovin’) AND “like” my Facebook page.

The patterns include:

So just follow, like and send me an email at juliastitches @ me.com with your email address! If you already follow this blog and like the jkwdesigns page on Facebook, just drop me a line and tell me so. The first 10 people to do so will receive all 5 of the patterns–a $12.50 value!


4 Comments

Pattern: Mugunghwa, the National Flower of Korea

mugunghwa crochet pattern

This flower pattern was written in memory of those who lost their lives aboard the Sewol off the South Korean coast on the morning of April 16, 2014. The mugunghwa, or the Rose of Sharon, is the national flower of Korea, and it has long held significance in Korean history and culture. Koreans have treasured the mugunghwa flower for centuries, and its name stems from the word mugung, which means immortality. The flower is incredibly resilient, so as the national flower, it reflects the enduring spirit, the perseverance and the determination of the people and culture.

But mostly, I just wanted to make something beautiful during this dark time… And as I worked on this, I thought about the stories of the heroes that have emerged like Park JiYoung, Kim KiWoong, and Jeong HyunSeon–people who gave bravely and selflessly. They truly are the epitome of what the mugunghwa flower symbolizes. Their spirit endures…

Materials:

Small amount of worsted weight yarn (in 2 colors for flower and yellow for stamen)
4.00mm crochet hook (size G)
tapestry needle

A note on colors: While the flower can be made in a variety of colors of your choice, the mugunghwa that serves as the Korean national flower is the dansim variety, which has a dark pink or red center. It is most commonly found in light pink with a dark pink/red center or in white with a dark pink/red center. Other varieties are the baekdal (pure white) and the yeesadal (pale pink flower with darker pink specks on the petals).

Flower Pattern:

Round 1: With Color A, make a magic loop and make 5 sc in the loop. Pull yarn tightly to close hole. Do not cut yarn.

Round 2: Attach Color B to beginning of round and ch 5. Sl st in next sc to join. Continue to Ch 5 and sl st in next sc until you reach beginning of round. Last sl st should be in the beginning sc. Finish off and cut yarn.

Round 3: In Round 3, you will be making individual petals, one at a time, while continuing to work in the round, eliminating the need to sew individual petals onto the center.

Row 1 of petal: With Color A, sc in back loop only of each of the 5-ch. [5 sc] Ch 1 and turn.
Row 2 of petal: Sc in first 2 st. 2 sc in next st. Sc in last 2 st. [6 sc] Ch 1 and turn.
Row 3 of petal: Sc in first 2 st. 2 sc in next st. Sc in last 3 st. [7 sc] Ch 1 and turn.
Row 4 of petal: Sc in first 3 st. 2 sc in next st. Sc in last 3 st. [8 sc] Ch 1 and turn.
Row 5 of petal: Sc in first st. Dc in next st. Sl st in next st. Ch 2. Dc in next 3 st. Ch 2 and sl st in same st as last dc. Dc in next st. Sc in last st. Sl st evenly down left side of the petal (4 sl st). The last sl st should be at the bottom of the petal.
Petal complete.

Continue on to the next petal by returning to the next 5-ch and beginning again with Row 1 of petal. Repeat the petal pattern 4 more times and complete the flower with a sl st in the first st of the first petal.

mugunghwa tutorial

1) View of work once Round 2 is complete. 2) Sc into back loops only of each 5-ch. 3) View of work once one petal is complete. 4) View of work once all 5 petals are complete (prior to sewing down petals and adding stamen).


Finish off and leave a long tail to pin the petals in place. The petals overlap one another on one side, creating a slight swirl of petals as they emerge from the center of the flower. Using a tapestry needle, simply stitch the petals in place on the back of petals. Weave in ends.

Stamen:

Ch 11. 2 sc in 2nd ch from hook. 2 sc in each ch. Finish off, leaving a long tail to stitch stamen to center of flower. The piece that you have just made will curl in on itself. Carefully tighten the coil and use the tail to stitch the coil together so that it remains coiled. Sew onto the center of the flower. Weave in ends.

IMG_7367

mugunghwa


6 Comments

Pattern: Flower Lens Buddy

flower lens buddy

I have several wonderfully talented photographer-friends, which is great for someone who loves to make things for babies and young children. In addition to all the adorable photo props I’ve made for them and their tiny clients, they’ve been requesting some camera-specific items, the camera buddy or lens buddy being one of them. I currently have several in the works, and eventually, the patterns will be available for purchase, but here’s a pattern for one I whipped up for a friend. It’s quick and easy, and such a great way to get little ones to LOOK AT THE CAMERA!!! 😉

Materials:

Small amounts of worsted weight yarn (two colors)
5.0mm crochet hook (size H)
Elastic hair tie
Tapestry needle (optional, for weaving in ends)

Pattern:

With Color A (for center of flower)
Round 1: 36 sc around the elastic hair tie. Sl st to join with first sc. [36 sc]

Crochet elastic hair tie

Round 2: Ch 1. 2 hdc in 1st sc. Hdc in next 3 sc. *2 hdc in next sc. Hdc in next 3 sc. Repeat from * around. Sl st to join with first hdc. [45 hdc] Finish off and cut yarn.

With Color B (for petals)
Round 3: Attach yarn. Ch 1. *Sc in 1st, 2nd and 3rd st. Ch 2, turn. Dc in 1st st (the 3rd sc you just made before turning). 2 dc in next st. Dc in 3rd st. Ch 2, turn. Dc2tog 2 times. Sl st evenly down the left side of the petal, making the last sl st at the base of the first petal. One petal made. Moving on to the next st in the round, continue from * and repeat around until you reach the end. [15 petals] Sl st to beginning st of 1st petal to join. Finish off and weave in ends.


2 Comments

Yellow Ribbons for Sewol

For the past week, my heart–like so many others–has been broken into a million pieces as I watched the news and read countless stories about the tragedy that hit South Korea. The world watched in horror as hundreds of children died, and I wept as I imagined how scared they must have been, how their parents waited helplessly as hope of rescue faded. Even as we celebrated Easter with our friends and family and as I took my kids to the playground and to T-ball practice, my thoughts continued to return to those lives lost and the parents who are currently living their worst nightmare.

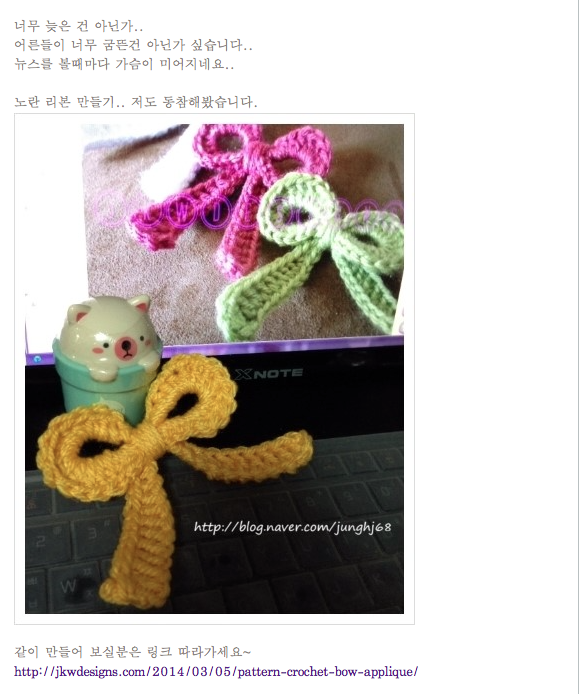
The past several days, I’ve been thinking about something, anything I could do… And I’ve felt so helpless. I’m in the process of writing a pattern for the national flower of Korea, the mugunghwa, or the Rose of Sharon. It’s nothing really in the grand scheme of things… But this morning, I noticed that there was suddenly a MASSIVE spike in visitors to my site from Korea, specifically to my ribbon appliqué pattern. I did some searching, and the visitors were directed to my blog from a Korean knitting forum as well as a couple of Korean knitting blogs. My ribbon pattern is now being used to make yellow ribbons in memory of those who died on the Sewol.

Ribbons for SewolThe pattern has also been translated into Korean.

I’m both honored and heartbroken.

If you use my pattern, I ask that you make one in yellow and say a prayer so that those who perished, those who lost loved ones, and those who survived may find peace.


2 Comments

Pattern: Simple Flower with Layered Petals

free flower pattern

I like knitting and crocheting things in as few pieces as possible, mainly because I really hate hand-sewing. And weaving in ends. This flower is very similar to the Quick and Easy 5 or 6 Petal Flower pattern, but you’ll be adding a round of chains to the back of the previous round’s petals to add layers. Sounds way more complicated than it is. Just check out the pics to see how it’s done!

This flower can be made with any weight yarn and an appropriate crochet hook. With worsted weight yarn and a size 4.5 mm crochet hook, the flower is approximately 3 inches across.

Crochet Flower w/ Layered Petals

©jkwdesigns – This pattern is for personal or charitable use only. Please do not repost or distribute the pattern, and please link back to this pattern page if you share your lovely little bow creations on your website or blog. Thank you!

Round 1: Begin with a magic loop/magic circle. Depending on the number of petals you would like on your flower, sc 5 or 6 (or more!) into the magic loop. Pull tightly to close loop. Sl st to join with first sc in round.

magic loop

Round 2: Ch 2. 2 dc, ch 2 and sl st into the first sc. *Ch 2. 2 dc, ch 2 and sl st into the next sc. Repeat from * until you reach the end of the round.

crochet flower

Round 3: You will be creating the “base” for your next round of petals. Ch 1. Sc into the BACK of the first petal by inserting the hook under a strand of yarn from EACH of the 2 double crochets of the first petal. The reason for grabbing 2 strands is to prevent pulling on one stitch and deforming the petal as you work around. *Ch 2, sc into the back of the next petal. Repeat from * until you reach the beginning of the round. Sl st to join with the 1st sc.

crochet flower

Round 4: This round creates the 2nd round of petals. *Ch 2. In ch-2 space: 4 dc, ch 2, sl st to join. Repeat from * in the next ch-2 space until you reach the beginning of the round.

crochet flowercrochet flower

Round 5: This round creates the base for the 3rd round of petals. Ch 2. Sc into the back of the first petal of round 2. *Ch 3, sc into the back of the next petal. Repeat from * until you reach the beginning of the round. Sl st to join with the 1st sc.

crochet flower

Round 6: This round creates the 3rd round of petals. *Ch 2. In ch-3 space: 2 dc, 2 trc, 2 dc, ch 2, and sl st to join. Repeat from * in the next ch-3 space until you reach the beginning of the round.

crochet flower

Finish off and weave in ends.

If you’d like to make your flower larger and more elaborate, just add petals and extra layers!

crochet flower

For extra petals:

In round 1, add an extra sc for each additional petal. If you would like a 7 petal flower, make 7 sc. For an 8 petal flower, make 8 sc. I don’t recommend making more than 8 petals as the more petals you add, the more the petals curl in on themselves. Continue with the rest of the pattern.

For extra layers:

After round 6, you will need to make an additional base round for the next round of petals. Also, the petals in each subsequent round need to be larger than the petals in the previous round. So in the 7th round, ch 4 between each sc into the back of each petal. Then, in round 8, you’ll want to ch 2, 2dc, 4trc, 2dc, ch 2, and sl st to join in each ch-4 space for each petal.

For each subsequent layer of petals, make the ch-space longer by one chain, then add 2 trc to the petal.